人都是被逼出来的,业务突然来了的时候才能感到全速赶工的效率。这里记录一下如何用 10 分钟快速配置一个微信公众号自动回复机器人。
一些准备工作
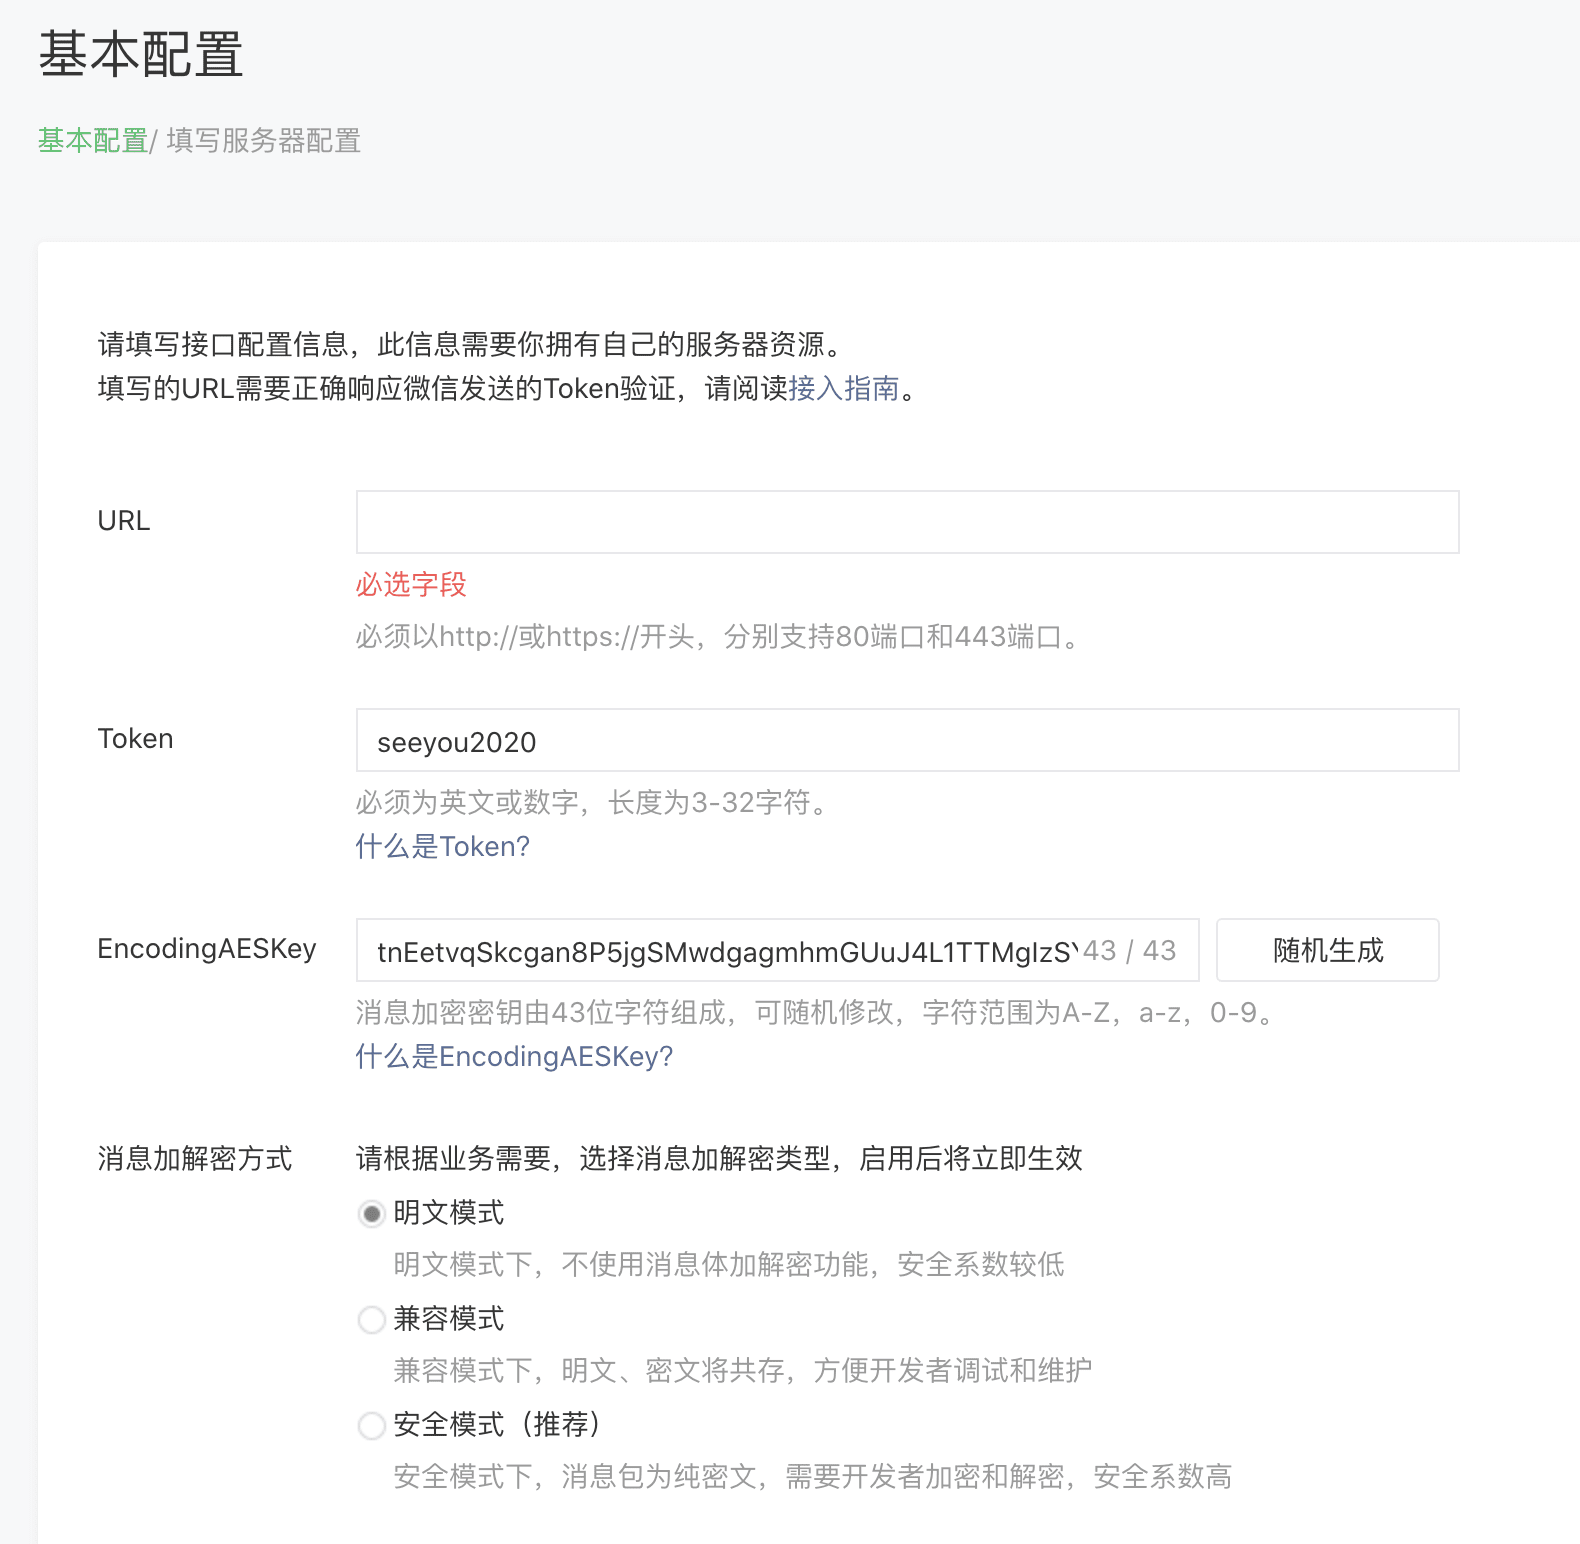
首先需要关闭微信提供的自动回复功能,然后登录微信公众平台,前往开发者配置的基本配置。
- URL :在这里输入你的接口地址,在下方的例子中,是
https://url/wechat。 - Token:你可以自己输入 Token,用于验证。
- EncodingAESKey:随机生成就好,同样用于验证。
- 消息加密方式:只要采用了 https 协议,明文模式也已经足够安全。为了便于开发调试我直接使用了明文方式。
快速让后端跑起来
需求很重要。没有必要在部署和非逻辑层上花费太多时间。下面是我使用的框架,在 get_reply(msg) 中写下你的业务逻辑就好。
对于比较复杂的项目,你可以考虑把一些方法拆分单独的文件中。
import hashlibfrom flask import  *import xml.etree.ElementTree as ETapp = Flask(__name__, static_url_path='/static')WECHAT_TOKEN  = 'YOUR TOKEN'AES_KEY = 'YOUR AES KEY'def get_reply(msg):    return 'You can write your own handler here.'def send(to_user, from_user, content):	reply = """
    <xml><ToUserName><![CDATA[%s]]></ToUserName>
    <FromUserName><![CDATA[%s]]></FromUserName>
    <CreateTime>%s</CreateTime>
    <MsgType><![CDATA[text]]></MsgType>
    <Content><![CDATA[%s]]></Content>
    <FuncFlag>0</FuncFlag></xml>
    """	response = make_response(reply % (to_user, from_user,	                                  str(int(time.time())), content))	response.content_type = 'application/xml'	return response    @app.route('/', methods=['POST', 'GET'])def index():	return 'You can write your own index page.'@app.route('/result', methods=['GET'])def export():	return app.send_static_file('result.html')@app.route('/wechat', methods=['POST', 'GET'])def wechat_post():	if (request.method == 'GET'):		# 验证信息		data = request.args		signature = data.get('signature', '')		timestamp = data.get('timestamp', '')		nonce = data.get('nonce', '')		echostr = data.get('echostr', '')		s = sorted([timestamp, nonce, WECHAT_TOKEN])		# 字典排序		s = ''.join(s)		if hashlib.sha1(s.encode('utf-8')).hexdigest() == signature:			# 判断请求来源,并对接受的请求转换为utf-8后进行sha1加密			response = make_response(echostr)			return echostr		return 'Only requests from wechat will be accepted.'	if(request.method == 'POST'):		xml = ET.fromstring(request.data)		toUser = xml.find('ToUserName').text		fromUser = xml.find('FromUserName').text		msgType = xml.find("MsgType").text		if msgType == 'text':           # 文本消息			content = xml.find('Content').text           reply = get_reply(content)			return send(fromUser, toUser, reply)		elif msgType == 'event':           # 关注消息			return send(fromUser, toUser, 'Write your own follow message here.')		else:			return send(fromUser, toUser, "非文字消息。")	return 'Unexpected handler.'if __name__ == '__main__':	app.run(host='0.0.0.0', threaded=True)
用 Apache 部署起来
在项目根目录下新建一个 wsgi 文件,写入配置,修改成你的部署目录:
#! /usr/bin/python3.6import loggingimport syslogging.basicConfig(stream=sys.stderr)sys.path.insert(0, '/var/www/seeyoubot') # Your own deploy pathfrom server import app as applicationapplication.secret_key = 'just_a_secret_key' # Anything you want接着上传项目,在 Apache 的配置文件(通常位于 /etc/apache2/sites-enabled )下的新增一个 conf 文件,写入以下配置。修改一下 ServerName,WSGIScriptAlias 和 Directory 成你的工程位置:
<VirtualHost *:80> # Add machine's IP address or your subdomain ServerName yourserver.com # Give an alias to to start your website url with WSGIScriptAlias / /var/www/seeyoubot/seeyoubot.wsgi <Directory /var/www/seeyoubot/> # set permissions as per apache2.conf file Options FollowSymLinks AllowOverride None Require all granted </Directory> ErrorLog ${APACHE_LOG_DIR}/error.log LogLevel warn CustomLog ${APACHE_LOG_DIR}/access.log combined</VirtualHost>接下来service apache2 restart,回到微信公众平台点击提交,你应该已经可以提交成功了。现在你可以专注于处理回复消息的逻辑了。
References
- https://zhuanlan.zhihu.com/p/50801694
- https://developers.weixin.qq.com/doc/offiaccount/Message_Management/Passive_user_reply_message.html
青年节到了,顺祝节日快乐。
